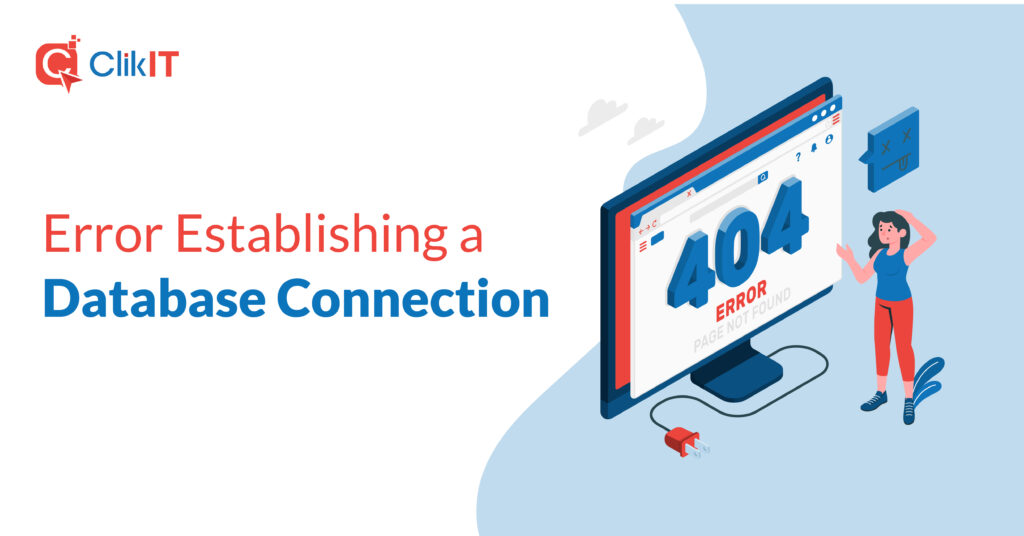
The “Error establishing a database connection” response is generated when your WordPress website can no longer access or connect properly with your website’s database. It is one of the most common runtime errors WordPress website owners face, and if left unchecked, it will lead to your website’s downtime and make you lose potential customers.
If you own a WordPress website that serves up customized content to your users that’s just for them, e.g: an E-commerce store (tracking details), social media app (profile, comments, and likes), or an online booking website (available bookings), your web server uses a scripting language like PHP to query the database server for the right content.
If there is a break in this database request process, the ‘Error establishing a database connection’ error is generated. If you’ve been a recent victim of this error, don’t fret. We’re here to help!
In the rest of this piece, we’ll be discussing some of the common causes of the ‘Error establishing a database connection’ error, how to troubleshoot them, and the quickest methods to fix this error so your website’s back up and running properly in no time.
Causes of the “Error establishing a database connection” error
So what are some common reasons why WordPress websites suddenly generate the “Error establishing a database connection” error? Let’s see them:
Wrong database login credentials
For your WordPress to successfully connect to your database, the login details contained in your website’s wp-config.php file have to be an exact match with the login details specified in your MySQL database settings.
If there is a mismatch, then your WordPress website won’t have access. The most common cause of a login credentials mismatch is when you migrate to a new web hosting provider.
A bugged database
Another common scenario is a corrupted or bugged database. Faulty website themes and plugins, or sometimes while installing or removing them, can corrupt database tables or delete critical information.
Thankfully, WordPress usually generates the “One or more database tables are unavailable” notification if your database gets corrupted which makes diagnosing this cause easier.
Corrupt files in WP installation
Another common cause of the “Error establishing a database connection” error is when your website files are corrupted, usually when installing WordPress.
Your WordPress core files can also get corrupted by faulty themes and plugins, and even worse, by bad actors trying to gain access to your website.
Database server-side issues
Your database server may also be the culprit. Depending on the hosting plan you have with your hosting provider, the server you are stored on may just not be able to handle the number of concurrent requests being made to it.
Traffic spikes, in particular, are one common scenario that leads to the error being generated, especially if you are on a shared hosting plan where you are sharing server resources with other websites.
Web server-side issues
The issue may also be on your web server. Once again, if you are on a shared hosting plan, the likelihood of traffic spikes on your website or other websites slowing down the server is high.
If this is the culprit, it’d be a good idea to upgrade your hosting plan to a higher tier with more allocated resources and fewer users on the same physical machine.
How to fix the “Error Establishing a Database Connection”
And now let’s get our hands dirty. Your website has popped up the “Error establishing a database connection” error, how exactly do you troubleshoot what’s causing it and how do you fix it? Let’s see how:
Access Your Database Login Credentials
As we discussed earlier, the first common reason for the error is a mismatch in the database login credentials and those in your wp-config.php file.
Especially after migrating to a new web hosting provider, the details may be changed, so you should them first. To confirm that they are one and the same, follow these steps:
Check the wp-config.php file
Your WordPress website’s database access details are located in the wp-config.php file found in your website’s root folder. You can access the wp-config.php file through your control panel or using a secure file transfer protocol.
ClikIT Care makes it super easy to access your wp-config.php file. Login into your hosting account on ClikIT Care:
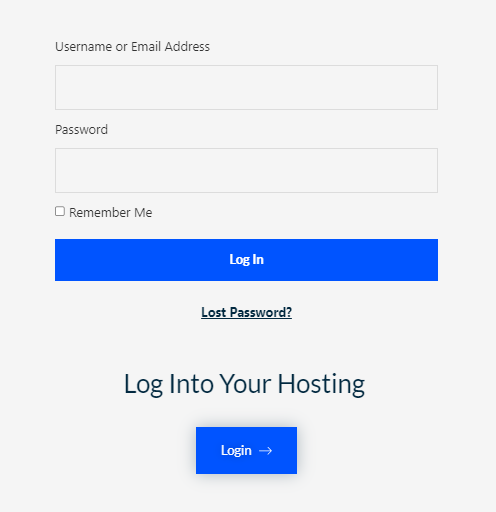
Fill in your hosting account login details and click on the lower ‘Login’ button under ‘Log Into Your Hosting’. You’ll be directed to a second login page. Fill in your details and once your account has loaded, click on the site you want to investigate:

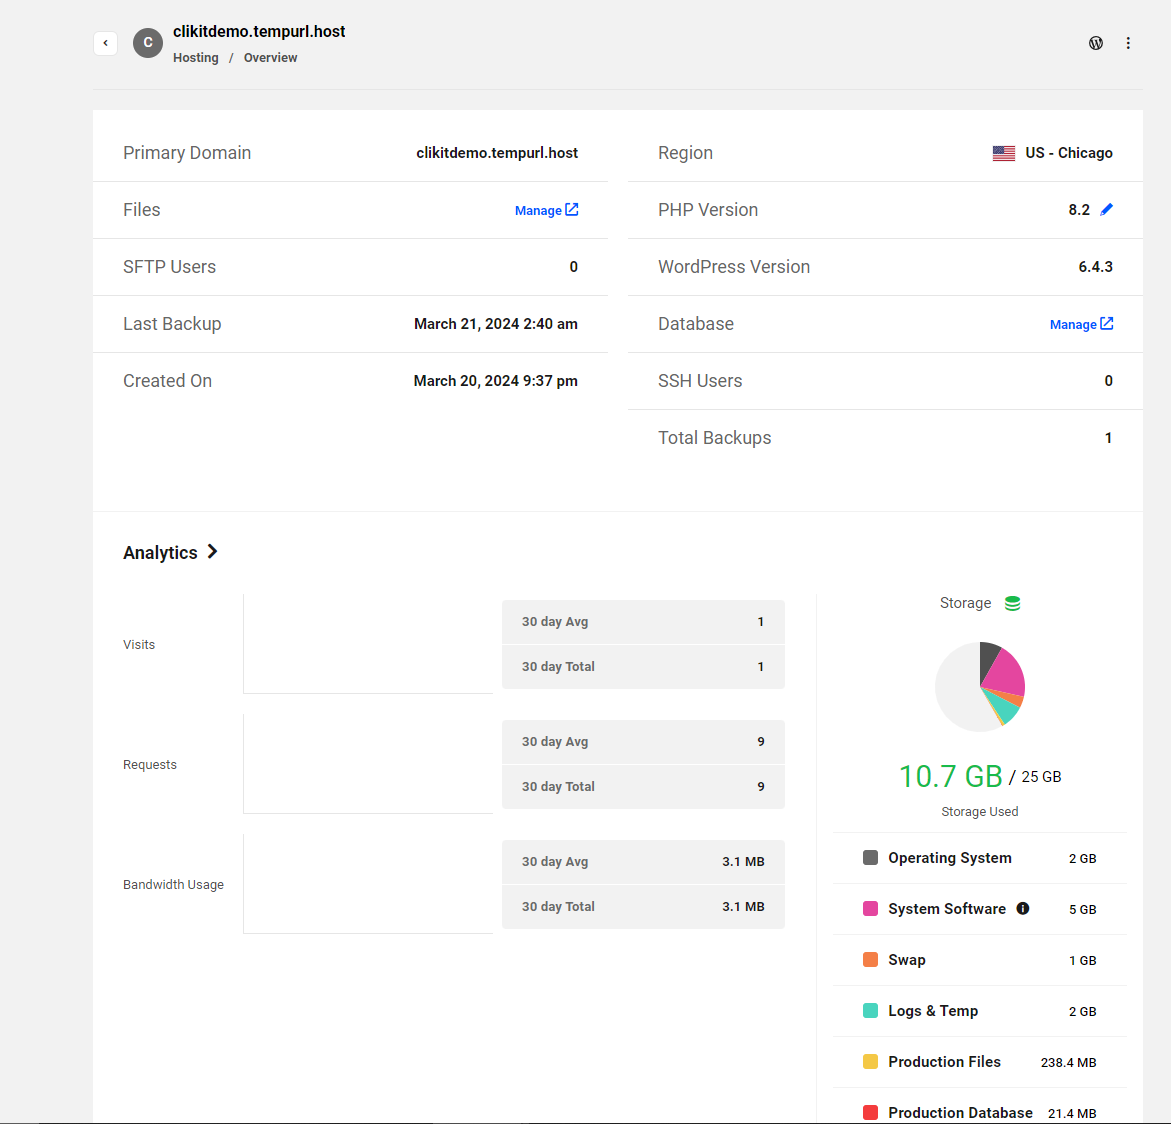
Once, you do, you’ll be redirected to your main hosting dashboard. Click on hosting overview, and then navigate to ‘Manage’ under Files:
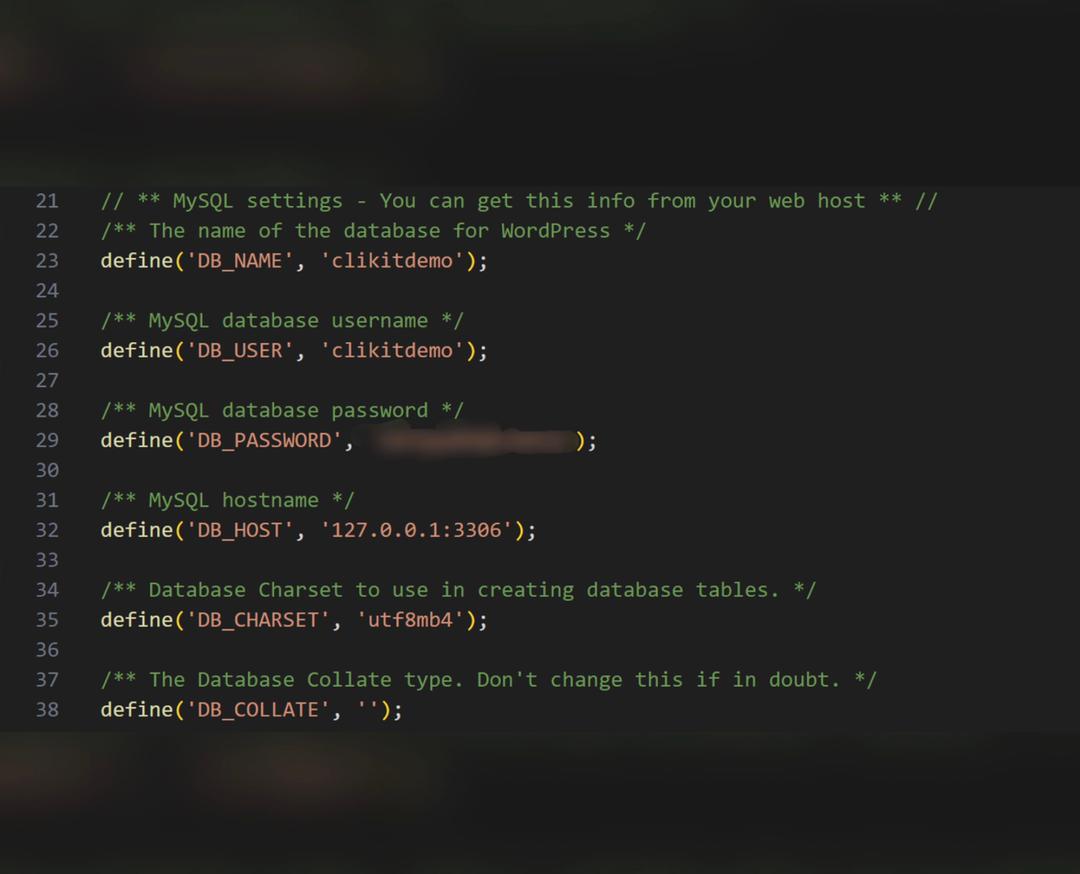
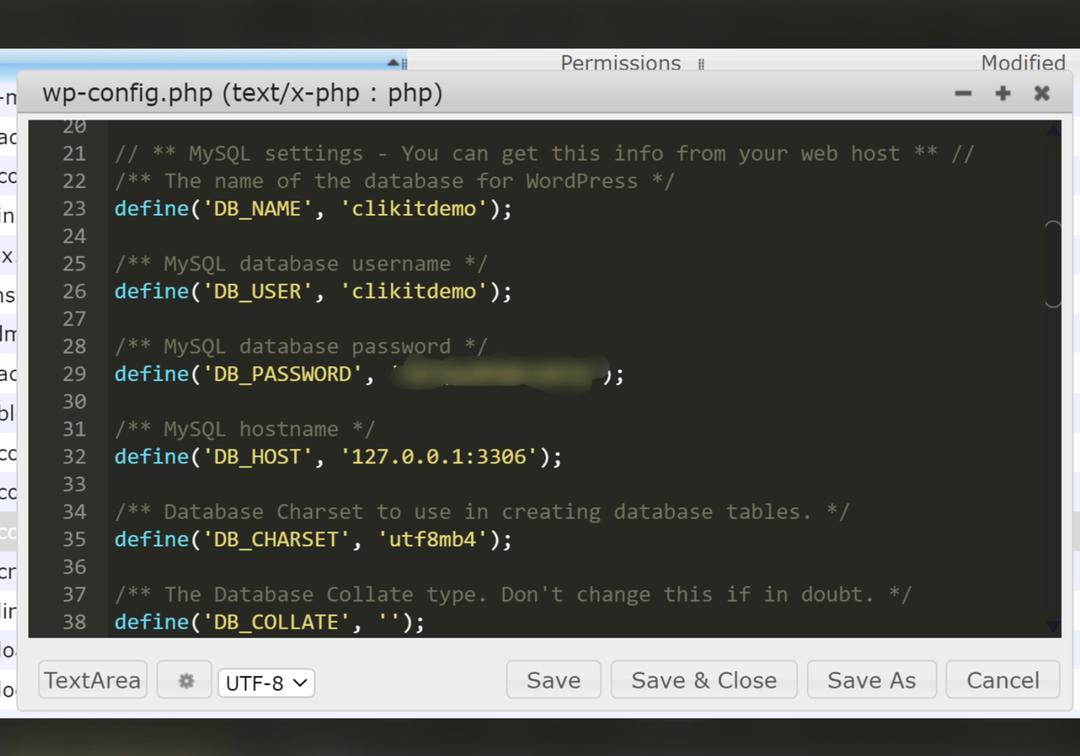
Now, you’ll be directed to your website’s root folder. Look for the ‘wp-config.php’ file, right-click on it, and click ‘open’ or ‘edit’. Note that you would have to save the file locally to your device before you can compare it.
After saving it, open it and view the details for Database Name(DB_NAME), MySQL database username(DB_USER), MySQL database password(DB_PASSWORD), and the MySQL hostname(DB_HOST) values. The wp-config.php file should like this:
Check the database login credentials
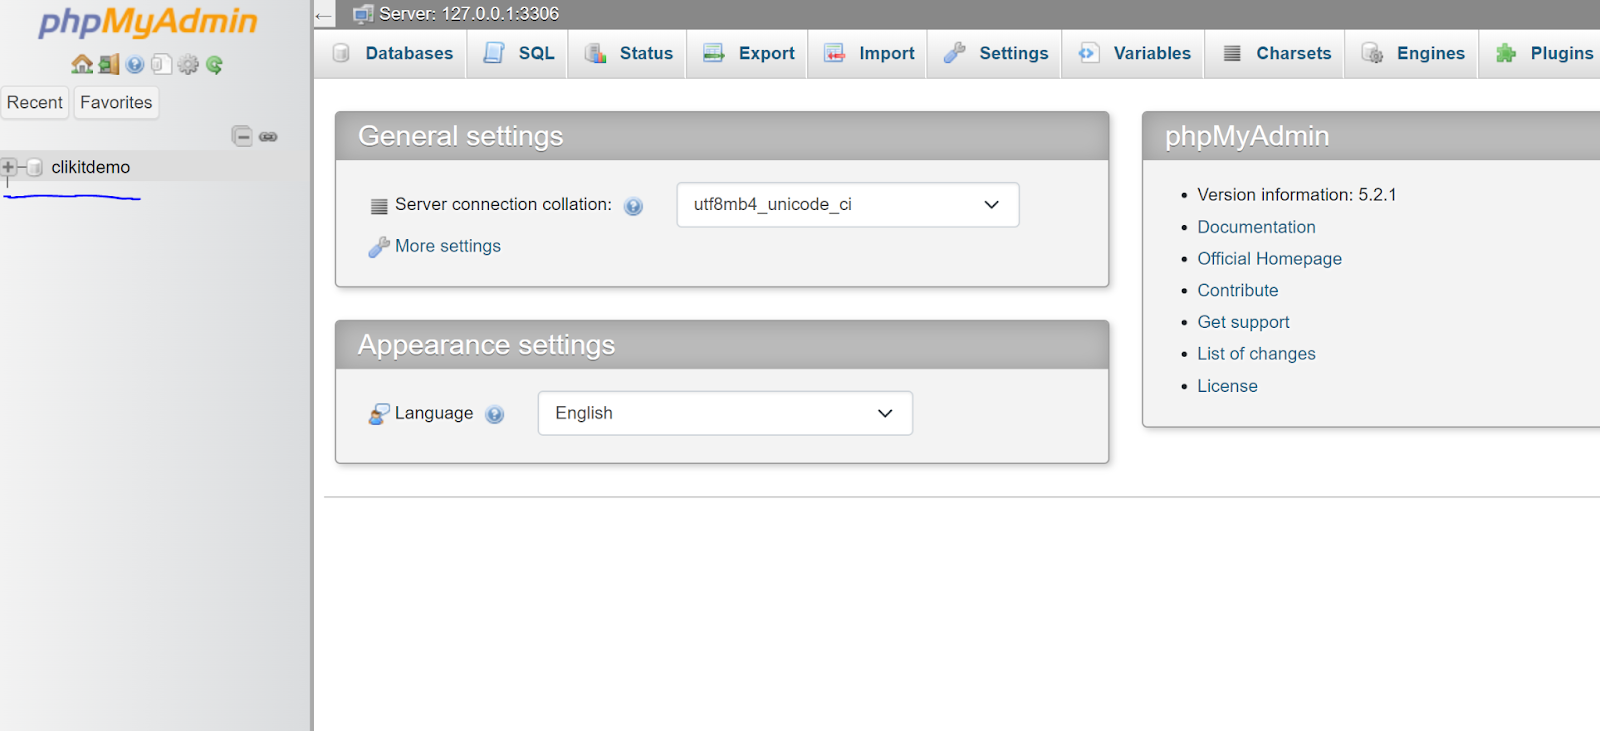
To check the current database login credentials, login to your phpMyAdmin in the cPanel of your current host. With ClikIT, simply navigate ‘tools’ under your hosting overview. Find ‘Database’ and click ‘Manage database’.

You’ll then be redirected your php admin page. Look for the database name on the left-hand side:
Now you want to confirm that the database name on your php admin matches the (DB_NAME) value in your wp-config.php file. If they match then this is not the problem. If they don’t then you would have to update the wp-config.php file information.
Head to your root folder, righ-click on the ‘wp-config.php’ file and select edit file.

Choose the editor you want to use and replace the values (what comes after each comma) of the DB_NAME with the correct value from your database name.
Save it and test it. If it works now, then voila!
If they match, but the error still comes up, then it’s time to confirm that the usernames and passwords also do. You’ll need to carry out a simple test to confirm this. First, create a test php file in the root folder of your website.
You can name the file ‘dbtest.php’ and paste in the following lines of code:
<?php
$test = mysqli_connect(‘localhost’, ‘db_user’, ‘db_password’);
if (!$test) {
die(‘MySQL Error: ‘ . mysqli_error());
}
echo ‘Your database connection worked well!’;
mysqli_close($testConnection);
Now edit and change the values of ‘db_user’ and ‘db_password’ in this new file to those in your wp-config.php file and test the file using the link :
If your database password and username are correct, then you’ll get the ‘Your database connection worked well!’ response. If they are not, then you’ll get a ‘MySQL Error: Access denied’ response.
To reset the database username and password in cPanel, head to MySQL Databases, and create a new MySQL user:

Now, choose a username and password, allow ‘all privileges’ to this new user, and create the user. Next, add the new user to your database so that the user becomes the portal through which your website has access to your database. Select the right database name and click add.
Once it’s done, take the new username and password you assigned to this new user, update them to your wp-config.php file, and retest your website. If the problem is a mismatch, then it will be resolved.
Using this approach also solves the error if it was due to insufficient user permissions. If you don’t want to create a new server, simply head to your MySQL databases, click on the three-dot menu beside your database name, and click ‘Change permissions’ and then grant all.
ClikIT Care makes it super easy to reset your wp-config file and we recommend this if you just migrated to a new host. Simply navigate to ‘tools’ in your hosting overview and click reset beside the WP-Config portal:

Point domain to web host
If you have just moved your website to a new web host or registrar, another very popular, yet simple culprit for the error is that your domain name may not be pointing to your web host’s nameservers.
If you registered the domain name and bought your hosting plans from the same provider, then this won’t be the issue as it is pointed automatically.
However to confirm that your domain name is pointing to the right servers, check the nameservers offered by your web host and run a WHOIS check on your domain name to see the nameservers it is pointing to.
Head to your hosting provider’s control panel, click on your list of websites, head to the management setting and look for ‘nameservers’.
Now, run a WHOIS lookup on your website’s domain name using this WHOIS tool. Type in your URL and run the query, and then look for Nameservers:
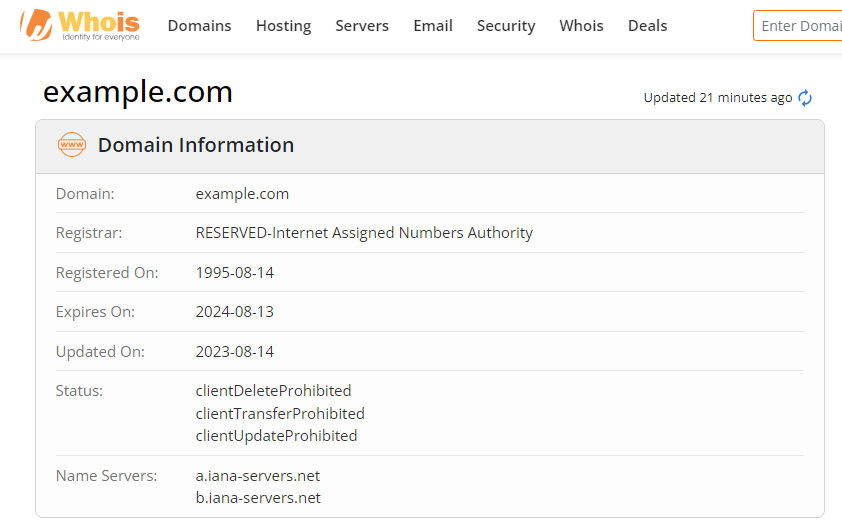
If the nameservers match with those in your hosting control panel, then this is not the issue. If they don’t match, then you would have to log in to your domain management settings at your current domain registrar account and update your nameservers to the ones specified in your hosting control panel.
Repair Corrupt WordPress Database
If the problem persists, then it may be time to repair your database if it has been corrupted by faulty themes or plugins. Themes and plugins on your WordPress website typically have access to your database tables and if you have many of them or have been installing or deactivating many at once, they may tamper with your database content.
Most times, if this is the issue, your WordPress website may spring up a ‘One or more database tables are unavailable. The database may need to be repaired’ response.
Thankfully, WordPress comes built-in with a database repair portal that allows you to fix basic database corruptions. To kickstart the process, simply head to your wp-config.php file, click on edit, and paste the following code at the bottom:
define(‘WP_ALLOW_REPAIR’, true);
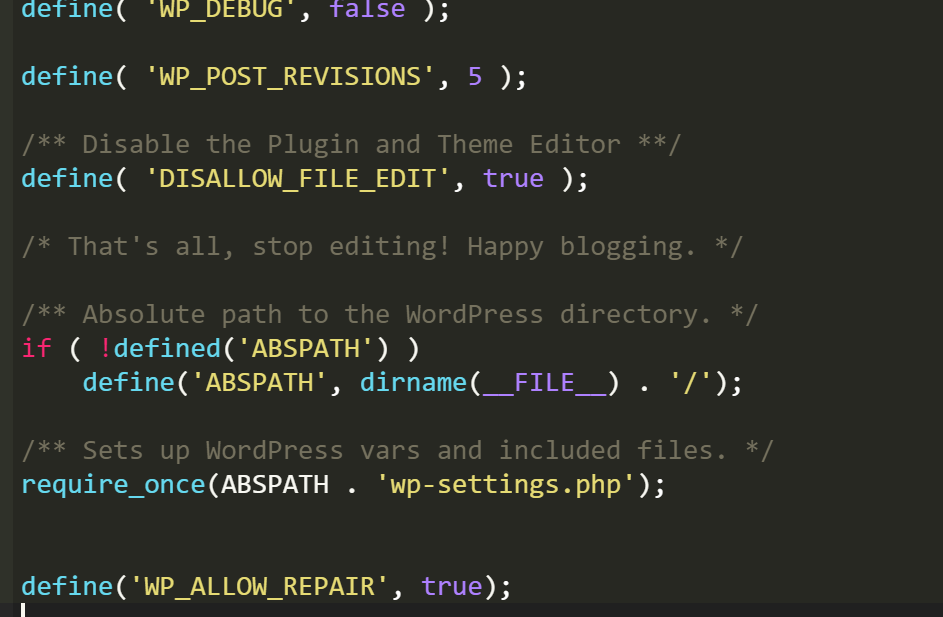
Save the file with the new details. Now head to WordPress’s database repair portal by pasting this link in your browser:
Of course, replace ‘yourdomainname’ with your actual domain name first before you hit enter.
A portal will load with ‘Repair database’ and ‘Repair and optimize database’.
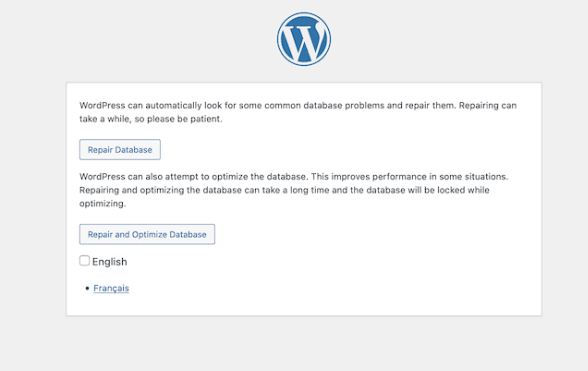
Click on the ‘Repair database’ and wait until the repair is done. Now test your website and see if the error is gone.
Note: Make sure to delete the database repair code ‘define(‘WP_ALLOW_REPAIR’, true);’ that you inserted into the wp-config.php file once you run the test as it will grant anyone access to it.
You can also repair your database via your phpMyAdmin panel in ClikIT. Simply log in to your portal, select your database, scroll down the list of tables to the bottom, and select all:
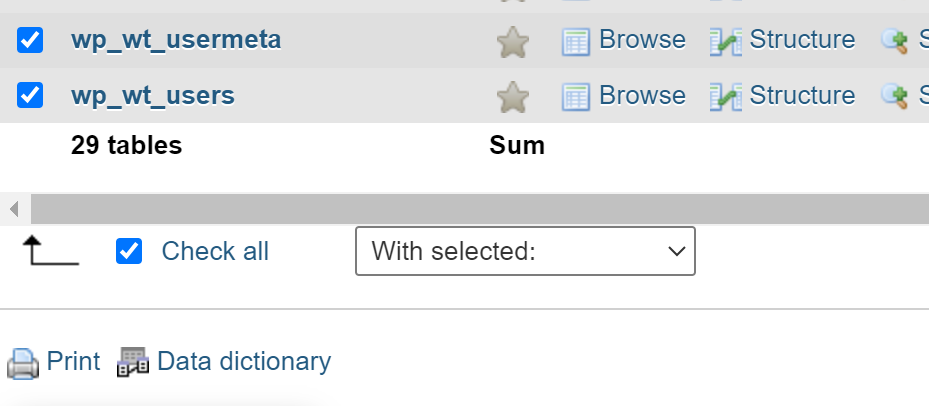
Under ‘With selected’ click, ‘repair table’. Wait for the process to finish and test it.
Fix Corrupt WordPress Files
Another popular culprit for the ‘Error establishing a database connection’ error is a corruption in your WordPress website’s code or files either while installing the application, from faulty plugins and themes, while transferring files, bad actors, etc..
To fix this, you’d need to reinstall your core WordPress software while leaving your themes and plugins intact. Head to WordPress.org and download a new WordPress setup folder.
Note: We strongly recommend that you backup your website’s data before initiating this step so that you can restore them in case this was not the fault.
All ClikIT Care’s managed WordPress hosting packages give you automated daily backups for your website.
Before installing it, open it and delete the ‘wp-content’ folder and the wp-config-sample.php file so that these don’t overwrite the current ones on your WordPress website.
Now using ‘File Manager’ on your website’s root folder, upload the remaining files from your device’s storage. You can also use an FTP to transfer your files to your root folder.
Now test your website and see. If the error still persists, the issue may be from a faulty theme or plugin. Uninstall any themes or plugins you installed recently and test your website.
To deactivate plugins, in your WordPress dashboard, click ‘Plugins’, then navigate to ‘Bulk actions’ and then click ‘Deactivate’. This will disable all your plugins. You can then turn them on one by one to see which is faulty and can remove any culprit.
To test your themes, simply activate each one by navigating to ‘Appearance’ and then ‘Themes’ in your WordPress dashboard to see which one is faulty.
In some cases, the ‘Error establishing a database connection’ error may also block your access to your WordPress dashboard. To disable plugins and themes, simply head to your root folder, enter the wp-content file, and rename the ‘plugins’ folder.
Now restore the folder name and test each plugin by activating them one after the other.
Check for Issues With Your Database Server
Another reason why your website may be generating the ‘Error establishing a database connection’ error is if there is an issue with the database server. In traffic spikes, the server may be overloaded and terminate any connection requests made to it.
It may be a good idea to investigate whether the issue is affecting other websites and not just yours by reaching out to your web hosting provider’s support to be sure.
If your database server is getting overloaded you can use WordPress caching plugins like WP Rocket, Sucuri, or WP Super Cache, to reduce the number of database requests being made to your database server.
Set a new URL for your WordPress website
If the error still hasn’t been resolved, another popular scenario is the URL for your WordPress website may have changed, especially if you noticed the issue only started after you moved to a new web hosting provider.
To fix the right WordPress URL, you will need to access your backend and change the old URL to a new one using some SQL code. Head to your phpMyAdmin panel and click on your database name.
Click ‘SQL’ at the top and paste in this code:
UPDATE wp_options SET option_value = replace(option_value, 'http://www.olddomainname.com', 'http://www.newdomainname.com') WHERE option_name = 'home' OR option_name = 'siteurl';

UPDATE wp_posts SET guid = replace(guid, 'http://www.olddomainname.com','http://www.newdomainname.com');

UPDATE wp_posts SET post_content = replace(post_content, 'http://www.olddomainname.com', 'http://www.newdomainname.com');

UPDATE wp_postmeta SET meta_value = replace(meta_value,'http://www.olddomainname.com','http://www.newdomainname.com');
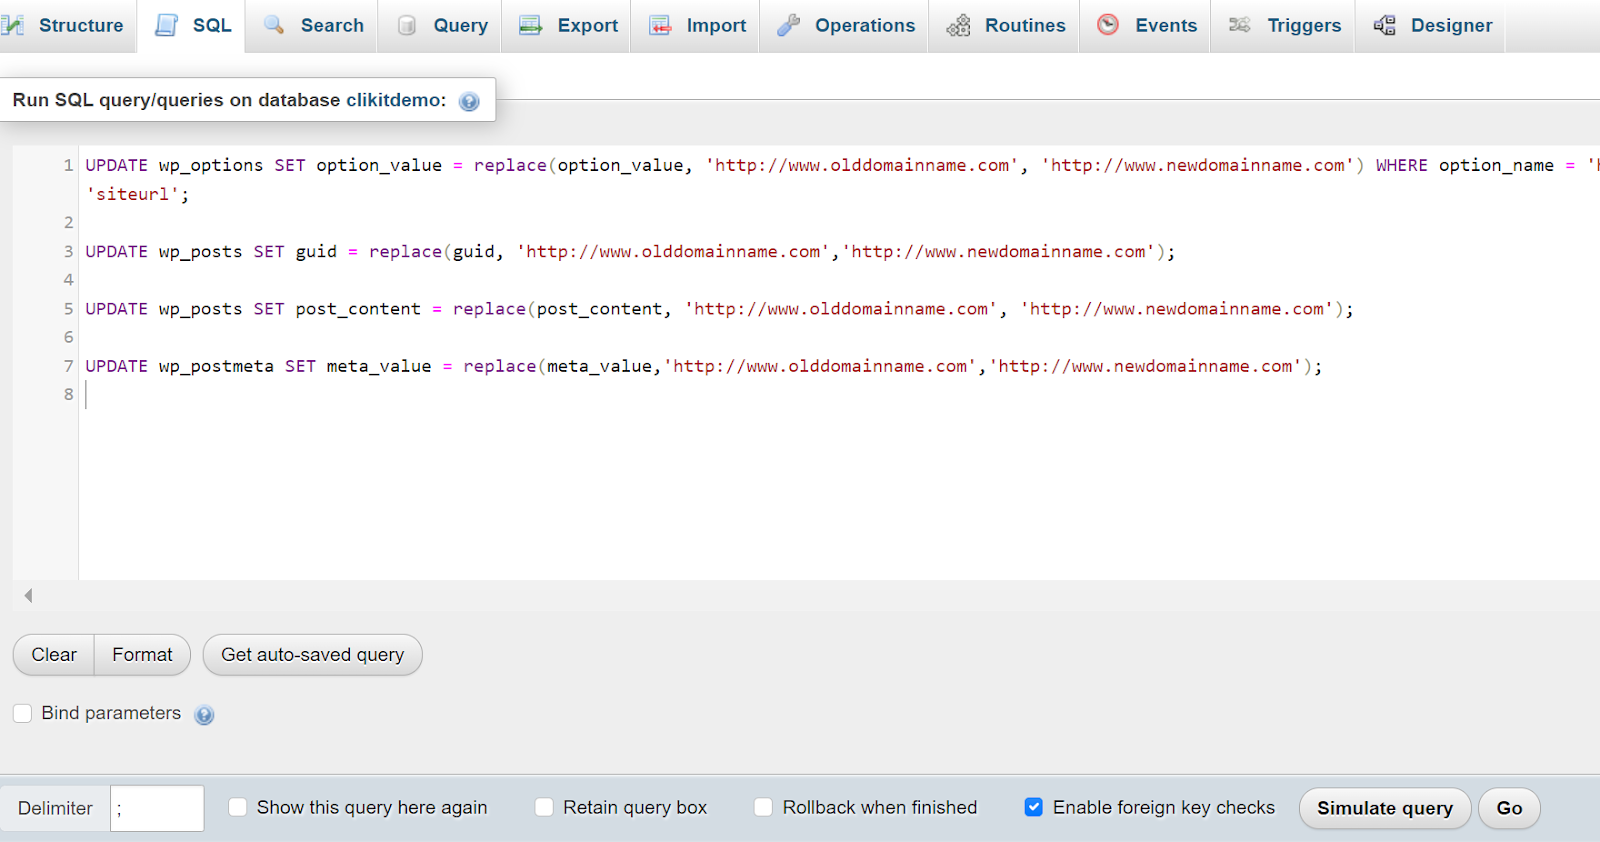
Put in your old URL where you see ‘olddomainname.com’ and then your new URL in place of ‘newdomainname’com’. Click on ‘Go’ to run the script and update the changes.
Restore a previous backup
As a last resort to fixing the ‘Error establishing a database connection’ error, you can restore a previous backup of your website to when you were certain everything was working perfectly.
This is an especially great option if your website hasn’t changed much from a recent backup till now when the error is popping up.
Depending on the web host you are using, the backup-restore process will vary. ClikIT Care makes restoring recent backups of your website super quick and convenient.
Simply head to ‘Backup’ on your main dashboard, navigate to ‘Dashboard’, and click on the 3-dot icon by the right of the backup you want to restore. Click ‘restore’ and voila! It’s done:
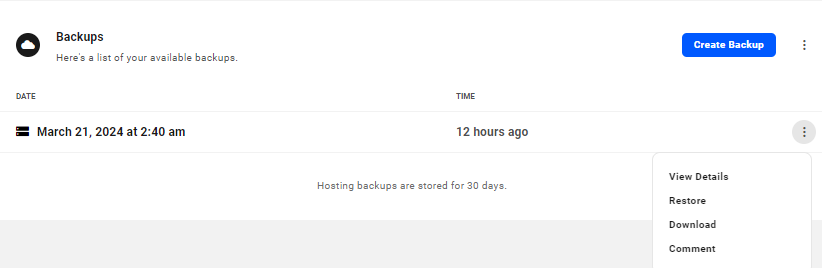
ClikIT Care stores your backed-up website data for 30 days across 30 data points for our basic plans and up to 720 data points (hourly) for our Grand Clik plan.
Contact WordPress support – ClikIT Care
And we saved the best for last. If you have tried these troubleshooting steps and the “Error establishing a database connection” error still persists, reach out to us for your personalized WordPress help.
Whether you want a one-time fix:

…or don’t want to ever bother with solving WordPress issues again by subscribing to one of our WordPress Help packages, we have the plan for you: